Electronic applications for crank organs
Since a few years also some traditional organ manufacturers took advantage of the electronic technology to simplify the life of the organ operators.
The preferred area in which these development took place is in the replacement of carton books and
paper rolls with music loaded in electronic memory devices.
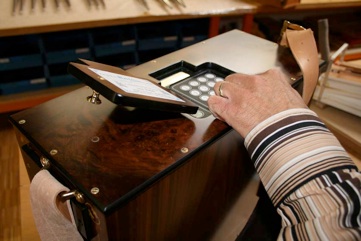
Some manufacturers utilize proprietory electronic systems where you cannot create and store the songs, while others, which utilize the universal MIDI protocol in their systems, offer the possibility, by using your PC MIDI system, to load song arrangements created or chosen by you.
While recognizing that arranging is an art and not so simple, nevertheless the MIDI system offers to everybody the chance to try, to exchange songs via web and to buy songs when necessary to add to your repertoire.
Rather than explore the art of arranging, which is not my specialty, I will focus on the hardware necessary to the self constructor to approach the world of MIDI applications for crank organ.
The principle of operation
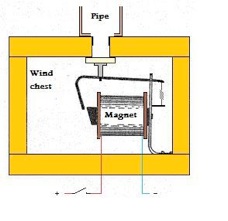
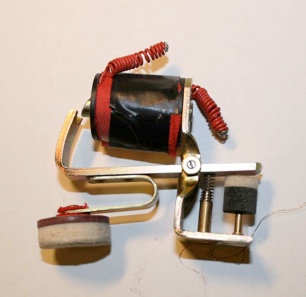
The core device is the so called Electro Valve, which is utilized in organ building since the beginnng of 1900.
The figure below explains the concept better than any description. When a voltage pulse is applied the magnet is activated and the wind coming from the wind chest flows to the pipe. When the voltage pulse stops, according to the note length, the wind is interrupted and no more sound is generated.
So we must equip a valve for each pipe.
Let’s see how we send the voltage on/off command to the electric valve by means of a MIDI system.
Here I do not intend to describe what is MIDI because in over 26 years of existence of this standard, there is a lot of excellent literature about it suitable to any level of reader.
I suggest to newcomers to see the website of Jeff Glatt on this subject.
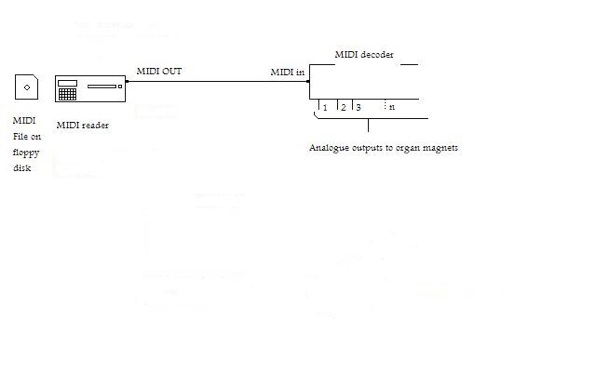
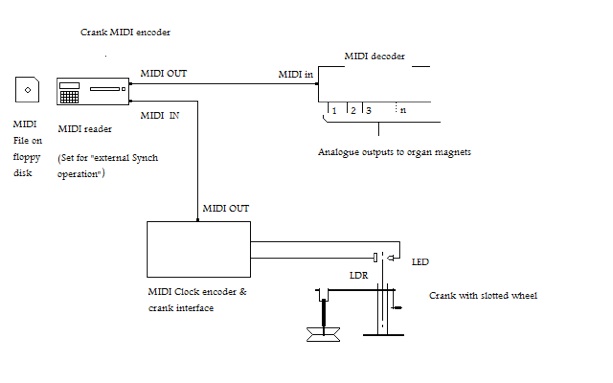
The typical set up of a MIDI system for a crank organ is shown here:
The MIDI data storage device
The MIDIfiles can be stored in hard disks of your PC, floppy discs, EEPROM memories, SD cards and the like.
You can either produce your MIDI songs or buy or download them from the net and save them on the above supports inMIDIfile format “songname.mid” .
The MIDI Data Reader
This is a device which reads the content of MIDIfiles and transmits the related MIDI data via its MIDI OUT port to a MIDI Decoder intalled on your organ.
There are a number of options to do so.
The MIDIFILES can be read through a PC (portable or desktop) equipped with a MIDI interface, by means of an appropriate category of programmes called sequencer.
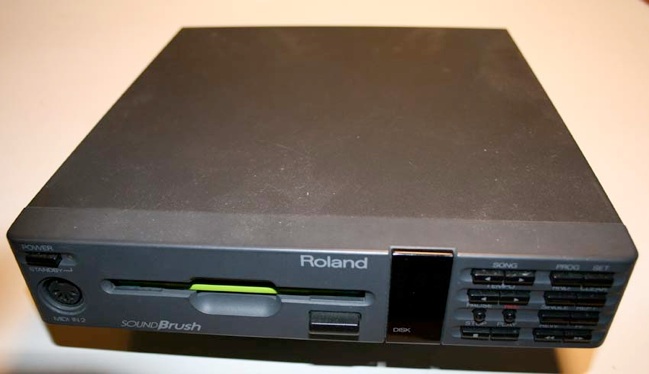
Another most common solution is the use of a MIDIfile reader based on floppy disk. These devices, commonly utilized by musicians , avoid to involve the PC, are small and some of them can work with 12VDC from a battery.
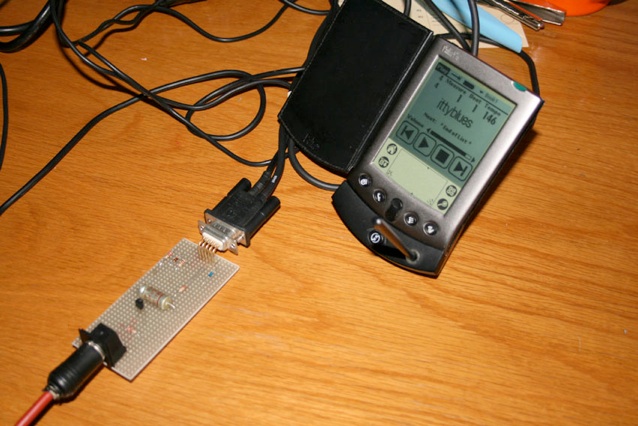
Another alternative can be represented by the PALM , which can be equipped with a simple MIDI interface adaptor. The MIDIfiles are loaded with a PC and stored in the internal memory of the Palm. A simple sequencer program can chose and read the MIDIfiles.
Here you can see my Palm with the MIDI interface I Built
More recently are appearing on the market full solid state dedicated MIDIreaders based on SD card or other electronic memories.
The MIDI Decoder
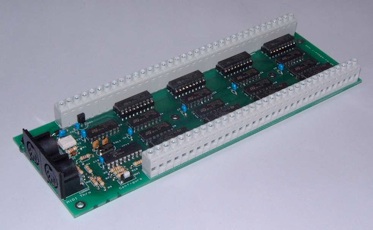
This device has the task to receive the MIDI Data of a song from the Data Reader and to drive the magnets of the Electric valve corresponding to each received note.
The input is a MIDI IN port and the outputs are several individual ports, each one corresponding to one note, into which a voltage will be sent or cut to respectively activate or turn off the magnet which manages the wind of the corresponding pipe.
The Electronic valve
There are a number of traditional manufacturers in the organ field offering these components which are currently utilized by liturgic organs applications.
According to the technology of the instrument there are two main ways to utilize the electronic valve.
The typical traditional crank organ works with pneumatic valves and the holes in the paper roll, when in correspondence of the hole of the tracker bar, let escape in the atmosphere the small pressure of the related valve. This allows the operation of the pneumatic valve.
Instead, in a purposely built organ with direct control of the wind through an electric valve, all the magnets are installed inside a wind box, kept under constant pressure by the windchest, and the valves when opened send the wind directly into the pipe toe.
This gives the advantage of building a more simple instrument with savings of material and troubles, as the pneumatic valves are not so easy to build and to handle.
The perspective of the self constructor and my experiments
If you intend to experiment a MIDI system for your crank organ, the first suggestion is to equip yourself adaquately with some tools to handle MIDI.
This means that besides your tools for wood working you have to become familiar with the PC that must have one MIDI interface. This device is available in many models and I suggest an USB version , better if with more than one MIDI IN and MIDI OUT ports, to have more flexibility in the system.
Next step the programs. The principal tool is the “Sequencer”, an application that allows to record, play and process any parameter of your MIDI song to make it suitable to your organ.
There are many choices to chose a Sequencer, from the freeware (http://www.anvilstudio.com) to the top professional, however also for less than 50 $ you can get a solid and proven product (http://www.pgmusic.com/powertracks.htm)
Generally the sequencers, besides graphically showing the staff and event list, provide the vision of the notes of the song in the “piano roll” format which is the most appropriate for mechanical organ applications.
The sequencer is essential to manipulate the MIDIfiles and in particular to modify, merge, cancel tracks and notes in order to obtain the MIDIflie that suits your expectations and suitable for the scale of your organ.
Then you may need an analysis tool, to check what your MIDI reader sends to its outputs or generally to make some diagnostics on the MIDIfiles and MIDI devices that you have interconnected.
I recommend a MIDI Monitor application, e.g. MIDIOX (http://www.midiox.com) is freely downloadable and I found it very useful in many circumstances.
My experiments
After building the Busker, and the frustrating experience to punch by hand the paper, I decided to go MIDI and just to start to build a 20 note instrument driven by MIDIfiles.
So I studied the various solutions of the other constructors and then I started to experiment.
My idea is to build by myself everything. I already proved to be succesful with wood so, considering my electronic background I feel comfortable with this idea.
Let’s see how I intend to proceed, considering each of the components of the MIDI system.
The MIDI data reader
As computer music is one of my hobbies, I already have a PC workstation equipped with MIDI hardware and software. Moreover I have been using a floppy disk MIDI reader (Roland Brush) since many years in external venues with my keyboard with my band.
In addition I employ the PALM V for which I built the MIDI interface.
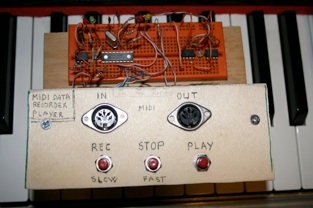
I am also employing an interesting MIDI recored-player based on PIC and flash memories, which I assembled recently which has very reduced dimensions, very low power consumption and can be loaded with a number of songs.
MIDI Decoder
In spite of the availability of these devices, the challenge of experimentation is too strong. One of my friends is skilled in micro programming and so we have developed one decoder custom for 20 notes plus 4 additional notes that could be employed for some percussive effect.
This device can be expanded to a larger number of notes.
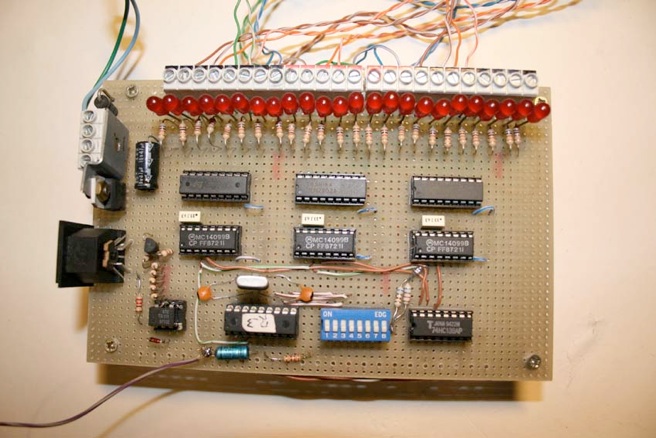
Magnets
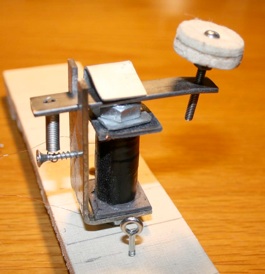
I believe that these are the most challenging item. I like cheallenges so I decided to try to build also this component.I made a number of different designs and now I am working with a solution that seems reliable.
The most tedious job is winding coils but this is an area in which my wife help is essential.
Crank speed encoder
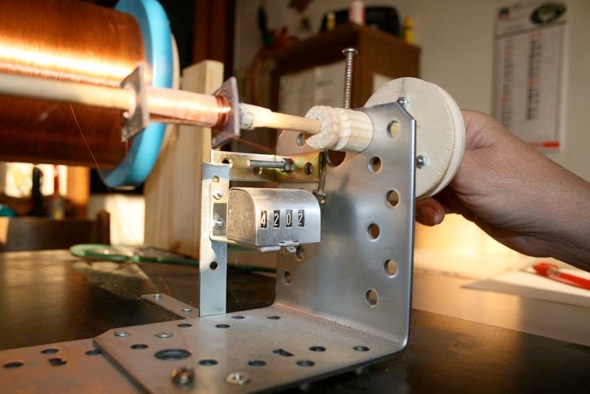
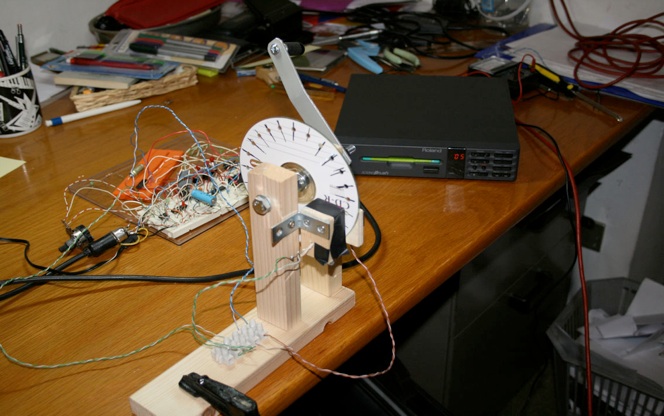
I have developed a device based on discrete components only (no SW to develop) that reads the rotation speed of the crank and generates MIDI clocks commands which are sent to the Roland Brush MIDI reader. The effect of real time crank is unbeliveable and adds humanization feeling to the otherwise steady MIDI data flow.
This device will be soon developed with a PIC microprocessor, which will reduce the number of involved components.
Dummy organ
Once I built the MIDI decoder I needed to test its operation .
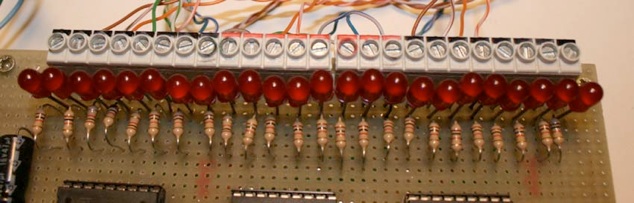
To do so I fitted 24 LEDs on the outputs of the decoder board and this gave me an immediate visual monitoring of what was going on during the performance of a MIDIfile.
But I was not yet satisfied, I wanted to hear the notes as well.
Unfortunately until the whole instrument will be built it will not be possible, therefore to fill the gap of a few months during which I will do the job of building bellows, magnets, windchest and pipes, I found a quick and easy way to surrogate the real thing.
The answer came from an old toy organ from Giaccaglia which was in my garage since a few decades. The electronic board contains the analogic generator for more than 3 octaves, which include the 20 notes of my project.
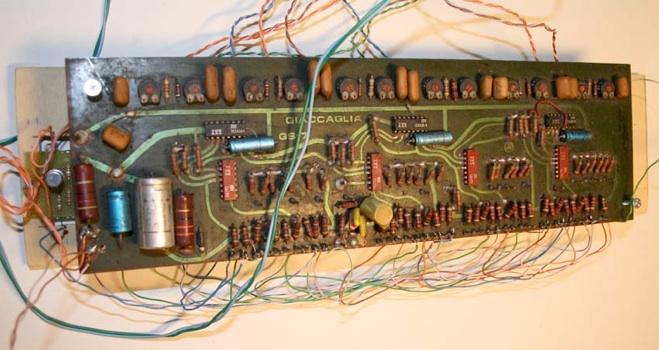
I
had to build 20 gates to adapt the output of the decoder to the signal of the organ board, but this was a very fast and easy thing to do and now I have a two layer board which, even if a little bulky, does its job.
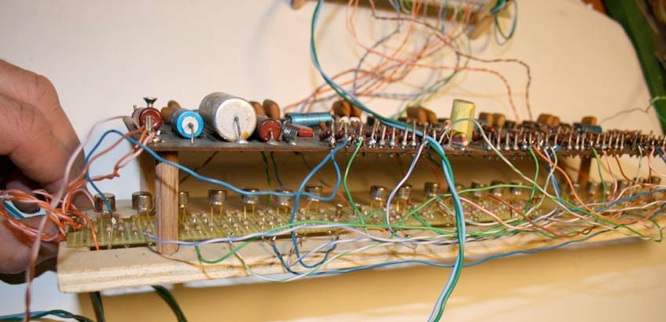
The sound is very raw, square wave not filtered, but acceptable for its experimental purpose.
This way I can hear immediately the sound effect of some MIDIfile orchestration well before to complete the definitive instrument.
It will take still some time before to conclude all the jobs under way however I am enjoying a lot making these experiments, sharing the experiences via web with a number of amateurs from different parts of the world.